Motorcycle gear mistakes can be deadly in a crash and most riders do not even realize they are making them. After more than five decades of riding, I have learned the most dangerous ones are a bad helmet fit, armor in the wrong places, gear worn out from the sun, wear and tear, or age, uncomfortable clothing you end up skipping, outfits that do not match the temperature, buying for style instead of protection, and using track gear on the street. Knowing these mistakes and avoiding them can make a huge difference in keeping you safe on the road.
I have seen riders drop thousands on premium gear, thinking the price tag or brand alone will keep them safe. You know the kind I mean: carbon fiber helmets, 1.2 to 1.4 mm cowhide or kangaroo leathers, armored everything. But even with all that gear, you can still slide down the highway at 50 mph and still end up in the trauma ward. So, what went wrong?
The problem is gear alone will not save you. It only works if it fits right and you wear it properly. Most serious injuries do not happen because the gear fails, they happen because riders wear it wrong. That shiny, expensive helmet or jacket can give you false confidence while quietly putting you in danger. And yes, these mistakes do not just happen to rookies, they catch out seasoned riders like us too.
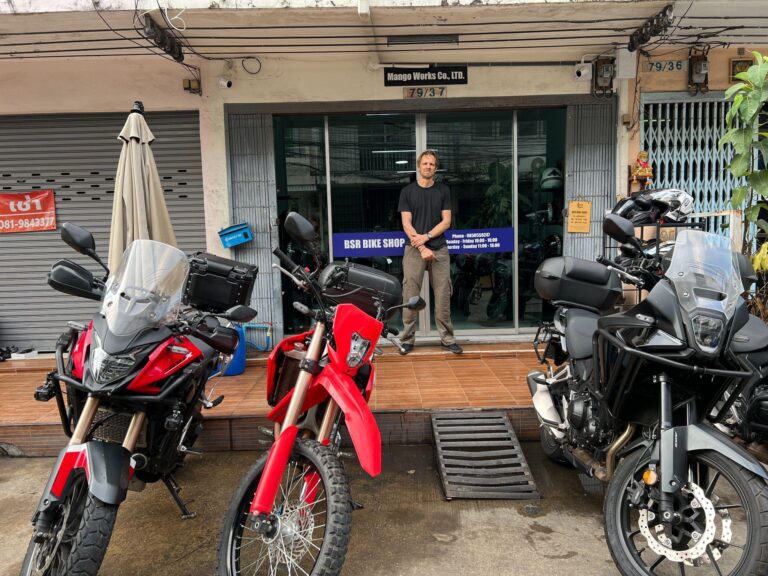
7 Motorcycle Gear Mistakes That Can Kill You from My Decades of Riding

I have seen it happen too many times: top-shelf helmets rotating during a crash, CE-rated armor sliding away from the parts it is supposed to protect, and boots with reinforced toes, heels, and ankles failing entirely. And it is not the gear’s fault. These are mistakes riders make that turn life-saving equipment into expensive decorations.
Today, I’m going to break down the seven motorcycle gear mistakes that are silently putting riders in the hospital every single day and show you how to avoid them.
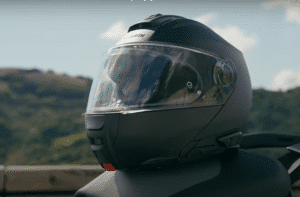
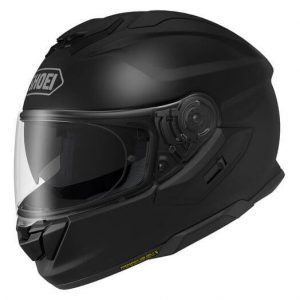
Mistake 1: A Bad Helmet Fit
That expensive AGV, Shoei, or Arai helmet sitting on your head might look perfect, but if it does not match your exact head shape, it can turn into a dangerous projectile the moment you crash. A loose helmet is actually worse than no helmet at all because it gives you a false sense of safety while protecting nothing.
When your head hits the pavement, physics takes over. A properly fitted helmet moves with your skull, spreading the impact across the shell. A loose helmet rotates on its own, leaving your face and the base of your skull completely exposed.
That rotation problem happens more often than most riders realize, and many have no idea it is even occurring. A helmet just one size too large can rotate forward by 18 to 33 degrees or sideways by 13 to 21 degrees, depending on the model, during a typical low-side crash. Those few degrees can mean the difference between walking away and needing major facial reconstruction. Your cheekbones were not made to take 60 mph of asphalt.
And here is the part that drives me crazy. Riders obsess over SHARP ratings, SNELL certifications, and helmet technology, yet completely ignore the one thing that actually matters, fit. People will spend hours researching helmets online, then pick whatever feels “comfortable” after thirty seconds in a store. That comfort trap is deadly.
Remember, helmet padding is designed to break in over the first few weeks. Those snug cheek pads you feel in the store? They are supposed to feel snug. The helmet should be tight enough that you can barely slide a finger between the padding and your skin. If it feels comfortable immediately, it is already too big.

But I have a quick test that could save your life. Put the helmet on, fasten the chin strap, and try to move it without undoing the strap. If it shifts or rotates more than a few millimeters, congratulations, you are wearing a decoration, not protection. Your skin should move with the helmet when you shift it around.
My Helmet Fit and Comfort Checklist
- Place the helmet level on your head; the front rim should sit 1-2 finger-widths above your eyebrows.
- It should feel snug with even pressure all around, like a firm handshake.
- Expect a tight initial fit; padding compresses by about 15-20% during the break-in period.
- Wear it for at least 10 minutes to check for any painful pressure points or “hot spots.”
- Cheek pads should press firmly without pain; your cheeks should move with the helmet when you move it side to side.
- With the chin strap unfastened, move the helmet side to side. Your skin should move with it, not slip underneath.
- Tilt it forward and backward; it shouldn’t roll over your eyes or lift at the back.
- Fasten the chin strap and perform a “roll-off” test. Have someone try to push the helmet off from the rear; a proper fit won’t come off.
- Once fastened, ensure you can fit only one to two fingers between the chin strap and your chin–snug but comfortable.
- Check your field of vision and hearing; neither should be obstructed.
- The side straps should form a neat “V” just below your ears.
- If you’re between sizes, choose the smaller size; the interior will loosen slightly with use.
Different brands fit differently. Arai tends to work best for rounder heads, while Shoei is usually a better match for oval ones. AGV helmets have that slightly elongated, egg-shaped fit, and Bell’s designs often suit both round and oval heads. HJC sits somewhere in between with an intermediate-oval shape. The point is, you cannot just grab a size off the shelf and assume it is right. Your head shape matters even more than the size on the tag.
Mistake 2. Armor in the Wrong Places
Armor fails to protect riders more than half the time, not because it is defective, but because it is sitting in the wrong spot when you hit the ground. That back protector you are counting on? If it shifts just three inches during a crash, it is guarding your ribs while your spine takes the full hit.
Here is the thing, motorcycle armor does not stay where you think it does once you go down. When you are upright on the bike, your shoulder pads sit perfectly over the joint. But the second you are sliding across the asphalt, your body twists, bends, and contorts, and suddenly your armor is protecting empty air while your shoulder blade takes the blow.

In high-side crashes, shoulder blades make up about a third of upper extremity injuries, yet shoulder pads (armor) sits way too high. The same goes for the lower spine and tailbone. They are prime targets in low-sides, but most back protectors stop four inches too short. And do not get me started on forearms; they take a beating in almost every crash, yet most riders only armor their elbows.
There is a simple way to see the problem for yourself. Put your gear on, get into your normal riding position, and have someone mark where your armor sits. Then, lie down on your side in a “crash” position. You will be shocked at how far everything shifts.
And Velcro-mounted armor is the worst offender as it can rip off within three seconds of sliding if not properly fitted, right when you need it most. Think about it: that tiny hook-and-loop fastener holding your shoulder armor in place is designed to handle about 20 pounds of static weight, not the thousands of pounds of force involved in high speed abrasion and sudden impacts.
While industrial-grade hook-and-loop fasteners can offer significant shear strength (up to 12-14 pounds per square inch), they have lower peel strength, which means a significant external force during a slide or roll can potentially cause the fastener to release or the attachment points on the fabric to fail.
Reputable, CE-certified gear (rated A, AA, or AAA under the EN 17092 standard) addresses this by integrating armor within snug-fitting internal pockets and relying on robust seam strength and garment construction to ensure the armor provides maximum impact absorption as rated by standards like EN 1621-1 or EN 1621-2.
How I Check My Armor Fits
- Wear your usual riding base layers: Try on the armor with the clothing you normally wear underneath for an accurate fit.
- Ensure a snug overall fit: The jacket, pants, or armored shirt should sit close to your body. No loose fabric or shifting armor.
- Perform the “Riding Position” test: Sit on your motorcycle or mimic your riding posture (leaning forward, arms extended).
- Sleeves should still cover your wrists and meet your gloves.
- The jacket should cover your lower back without riding up.
- Armor pads (shoulders, elbows, back, etc.) must stay centered over the correct body parts.
- Check mobility: Make sure you can comfortably turn your head, reach controls, and shift your body without pinching or tightness.
- Adjust the straps: Tighten waist, arm, or cuff straps to eliminate looseness and keep the armor stable.
- Verify armor stability: If armor pads move or slide easily when zipped up, the garment is too large.
- Ensure comfort, not pressure: The fit should feel secure and supportive. Not painful, restrictive, or hard to breathe in.
It takes five minutes to check your armor, and it could save your spine. Have a friend help you mark, move, and measure. If anything shifts more than an inch, you need a better attachment system or different gear altogether.
Mistake 3. Wearing Worn Out Gear From the Sun, Wear and Tear, or Age
Most riders do not realize their gear is quietly dying on the shelf long before it ever hits the pavement. UV exposure, heat, and time slowly destroy the materials that are supposed to protect you. That helmet sitting in your garage? If it is baking in the heat, you are literally cooking the protection out of it.

As it degrades, the EPS liner that cushions your brain experiences 40% reduction in impact absorption, and once that happens, it cannot do its job. The shell might still look brand new, but inside, it is as brittle as old Styrofoam: hard on the outside, useless when you need it most.
But the real killer is storage damage you never see coming. Garages, trunks (where temperatures can get much higher), and bike compartments often reach temps that ruin helmet foam completely. What you think is a $700 lifesaver might actually be an expensive hat that will split open on impact.
Leather gear faces the same slow death. Untreated leather exposed to sun, salt, and road grime turns dry and brittle, tearing like paper at crash speeds. The natural oils that make it flexible and strong evaporate over time unless you regularly condition it. I have seen beautiful jackets fail in a single slide just because the zippers corroded and blew open. When that happens, all your armor and abrasion resistance mean nothing.
My 5-Minute Motorcycle Gear Maintenance Routine
- Replace your helmet five years from its purchase date, seven years from its manufacture date, or after a crash, whichever comes first.
- Store your helmet in a cool, dry place away from direct sunlight.
- Clean it regularly with mild soap; harsh chemicals can weaken the shell.
- Inspect the EPS liner every few months for cracks or soft spots. If you can dent it with light finger pressure, replace it.
- Condition leather gear at least every three months (more often in harsh conditions) using products made for motorcycle leather, not shoe conditioners.
- Rinse off salt and road grime immediately after riding to prevent long-term damage.
- Maintain zippers in under 30 seconds per ride. Wipe clean, inspect for wear, and lubricate monthly. A failed zipper can turn your protective suit into a cape the moment you hit the ground.
Your gear can save your life, but only if it is alive itself.
Mistake 4. Uncomfortable Clothing You End Up Skipping
Comfort might make you skip the gear once or twice, but that is all it takes for things to go wrong. We have all done it. That heavy leather jacket with the armor that makes you feel invincible on long rides suddenly feels like too much for a 10-minute grocery run. You tell yourself it is just a quick trip, that nothing ever happens close to home. But those short, familiar rides are where 42% of accidents actually happen. Places where cars make that lazy left turn at an intersection because they “did not see you.”
And the problem is that comfort dictates consistency. If your gear is so stiff, hot, or awkward that you dread wearing it, you will start leaving it behind, and that is when luck runs out. It is not about fear, it is about human behavior. We are wired to choose convenience over caution, even when we know better. And that car pulling out of a driveway does not care if you are wearing full leathers, a T-shirt, or flip-flops. The asphalt will not care either; it will teach the same hard lesson.
So, find gear you will actually wear. Fit matters, ventilation matters, and comfort is what keeps you protected when complacency whispers, “It is just a quick ride.”
Mistake 5: Buying for Style Instead of Protection
It is easy to get caught up in the look. You see Marc Marquez tearing up the track to win his 7th MotoGP title and think, “Yeah, that’s the gear I need.” So, you drop serious cash on a full race suit, r acer boots, and aramid and Kevlar® fiber gloves that look straight out of a pit lane. But that gear was built for their world, not ours.
Track gear is designed for high-speed slides on perfect asphalt, not low-speed crashes on gravelly, oil-streaked streets. That fancy race leather that can survive a 120-mile-per-hour high-side might tear apart in a 35-mile-per-hour street crash. It’s not bad gear, it’s just made for the wrong battlefield.
And here is where even experienced riders get caught: the “aspiration trap.” You picture yourself carving corners at knee-dragging speeds, but most of your rides are commutes, grocery runs, or weekend trips. Track gear in city traffic is like wearing hiking boots to a sprint; it limits your movement and makes you slower to react.
Take racing boots, for example. They are rock solid at 100 mph but feel like cement blocks when you are trying to paddle your bike through a parking lot or save it from tipping at a stoplight. Same with competition gloves. They are great for impact resistance but terrible for fine control. On the street, where you are adjusting mirrors, flicking turn signals, and reacting to unpredictable drivers. That lack of feel can actually make you less safe.

Buy gear for the riding you actually do, not the fantasy version in your head. Real protection does not always look flashy, it just works when everything else goes wrong.