To check, remove, and replace your motorcycle wheel bearings, you must inspect them for wear, safely extract extract the old units, and correctly install replacements so that your wheels spin smoothly. Though small, wheel bearings support the bike’s weight and cut friction. When they fail, handling, stability, and safety degrade quickly. Despite this, they are often overlooked compared with oil changes or tire checks.
As someone who has maintained more than 25 motorcycles over the years, I was replacing the bearings on my Yamaha MT-07 today and was reminded how valuable this skill is for any rider. As a rule of thumb, inspect bearings every 7,500 miles, or about 5,000 miles, if you frequently ride in rain, mud, or off-road conditions, where water and grit shorten bearing life. A well-maintained set can last 20,000-100,000 miles, but always follow your motorcycle’s service manual for exact intervals, torque specs, and part numbers.
Learning how to inspect, remove, and replace wheel bearings on your specific motorcycle is an essential skill every rider should have in their maintenance toolkit.
| Wheel Bearings | Wheel Bearing Removal Tools |
|---|---|
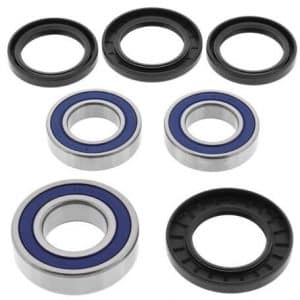 Buy on RevZilla | Amazon | 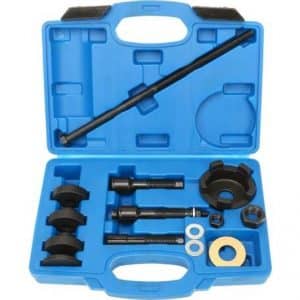 Buy on RevZilla | Amazon |
What Are Motorcycle Wheel Bearings?
Motorcycle wheel bearings are precision-engineered components housed inside the hub of each wheel. They consist of hardened steel or ceramic rolling elements (balls or rollers) located between an inner race and an outer race (or ring). Many are sealed and pre-lubricated to exclude dirt and moisture, which can rapidly shorten their life.
Their main function is to allow the wheel to rotate smoothly around the axle while minimizing friction. By supporting the radial (vertical) load of the motorcycle and rider, managing side or axial loads (from cornering, braking, or side forces), and reducing friction and heat, they contribute to smooth movement, good handling, longer component life, and reduce the risk of wheel instability or failure.
Without functioning wheel bearings, your motorcycle would experience rough movement, increased wear on the tires, and could even lead to wheel failure.
Why Do Motorcycle Wheel Bearings Fail or Wear Out?
| Cause of Failure | What You’ll Notice | How to Prevent It |
|---|---|---|
| Contamination & Seal Failure | Dirty/washed-out grease, rust, gritty feel when rotating bearing | Protect seals, avoid pressure-washing hubs, inspect after wet/muddy rides |
| Poor or Insufficient Lubrication | Dry or discolored grease, overheating, rough rotation | Use quality grease, avoid overheating, follow service-manual lubrication specs |
| Mis-installation or Improper Seating | Premature wear, uneven loading, wobble after service | Install with correct tools, ensure proper seating, follow torque specs |
| Low-Quality or Incorrect Bearings | Early failure, noise, inconsistent performance | Use OEM-spec or high-quality bearings rated for your bike’s loads |
| Excessive Axial (Thrust) Loads | Vibration during cornering/braking, uneven wear | Avoid repeated hard cornering/braking with low-spec bearings; choose bearings that handle combined loads |
| Shock Loads / Rough Roads / Potholes | Impact damage, flat spots, pitting, rough feel | Reduce impact speed, avoid deep potholes, choose bearings rated for harsh terrain |
| Rolling Contact Fatigue (RCF) | Gradual roughness, pitting, spalling inside bearing | Keep bearings clean/lubricated, avoid overloads, replace at first signs of wear |
| False Brinelling / Fretting Wear | Wear marks appearing after storage, roughness with low mileage | Rotate wheels periodically during storage; protect bike from vibration |
| Thermal Overload / Heat Damage | Grease breakdown, discolored metal, hot hub after riding | Avoid excess loads, ensure correct lubrication, inspect seals regularly |
| Electrical Damage (ABS / Sensor Bearings) | Unexplained corrosion or pitting in sensor-equipped bearings | Ensure proper grounding; inspect ABS-integrated hubs for electrical faults |
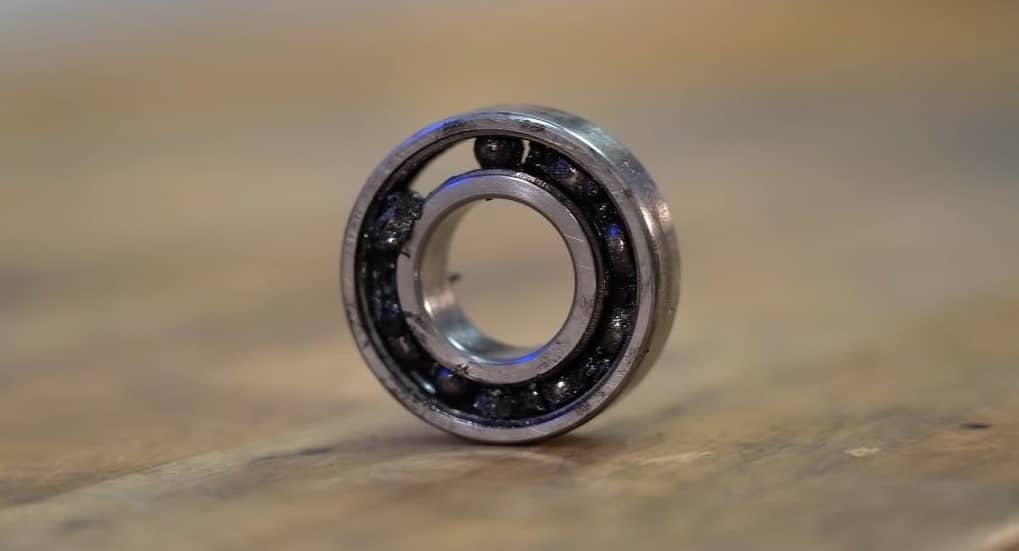
Motorcycle wheel bearings can fail for various reasons, each affecting the lifespan and performance of your bike. Understanding these causes helps you identify issues early and avoid costly repairs. Below are the primary factors that contribute to motorcycle wheel bearing damage or wear-out:
- Contamination & Seal Failure: Damaged or worn seals let in water and grit, turning grease into an abrasive mix that grinds down the bearing’s metal surfaces, leading to premature deterioration and often triggering rolling-contact fatigue (RCF) or brinelling. Common on bikes ridden in wet/muddy conditions or washed with high-pressure cleaners without proper protection.
- Poor or Missing Lubrication: Bearings require proper grease to minimize friction and wear. Without adequate lubrication, friction increases, causing fatigue, pitting, and eventual bearing failure. Often seen in bikes that have not been serviced regularly or where grease has been contaminated.
- Excessive Axial (Thrust) or Shock Loads: Bearings primarily designed for radial loads (vertical forces) may fail prematurely if subjected to excessive axial (side) forces. These side loads often occur during hard cornering, braking, wheelies, or aggressive riding, and are especially problematic if the bearing is not designed to handle such stresses. Improper load distribution from luggage or passengers or shock loads (potholes, jumps) also shift loads into unplanned directions and accelerate failure.
- Mis-Installation or Improper Seating: Incorrect installation can cause misalignment, uneven load distribution, and early bearing failure. It’s crucial that the bearing is seated properly and aligned correctly during installation to prevent unnecessary stress.
- Low-Quality Bearings or Mismatched Types: Using bearings that are not rated for your bike’s weight, speed, or environmental conditions can significantly shorten their lifespan. Always select high-quality bearings specifically designed for your motorcycle’s specifications and riding conditions.
Additional Failure Mechanisms
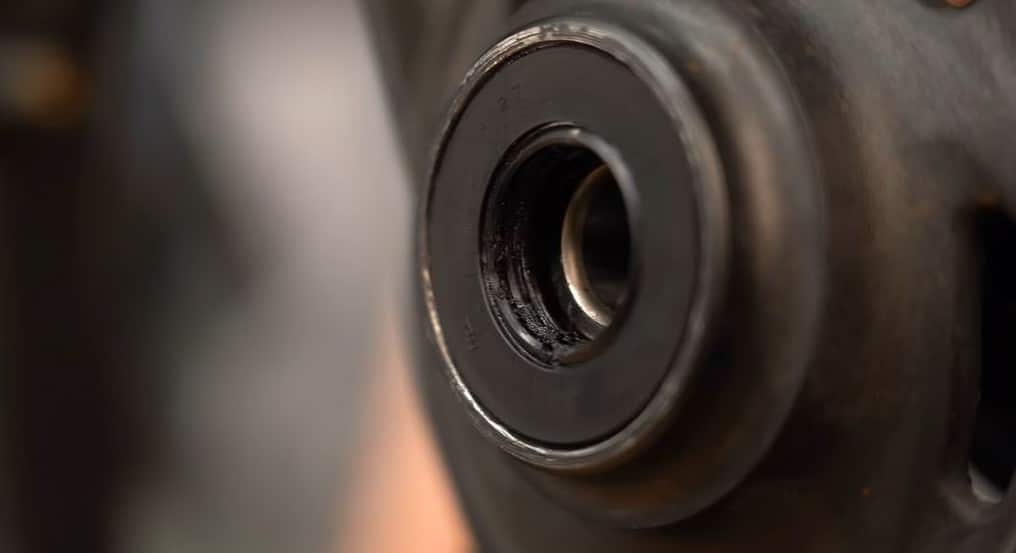
Several other factors can contribute to bearing failure. These mechanisms often go unnoticed until the damage is significant:
- Rolling Contact Fatigue (RCF): Occurs when microscopic cracks form under repeated cyclic loading of the bearing surfaces (the inner race, rolling elements (balls or rollers) and outer race). Over time, these cracks propagate into pits or spalls, degrading bearing performance. Even under normal radial load (weight of bike plus rider), if the bearing is mis-loaded, contaminated, or poorly lubricated, RCF becomes a dominant failure mode.
- False Brinelling & Fretting Wear: Small oscillations or vibrations, such as those experienced while the bike is stationary or on a stand, can cause fretting wear. The absence of proper lubrication allows metal-to-metal contact, which results in wear marks on the bearing races, often mimicking true brinelling. A bearing sitting unused for long periods or winter-stored without proper precautions can develop internal damage even before the wheel is ridden.
- Thermal Overload & Heat-Induced Degradation: Excessive friction, contamination, or poor lubrication can cause bearings to run hot. The heat breaks down the grease, reducing its effectiveness, and can even change the properties of the bearing material, accelerating fatigue and failure.
- Electrical damage (ABS/Sensor Bearings): In modern motorcycles with bearing/hub assemblies incorporating sensors for ABS or traction control, stray electrical currents or improperly grounded systems can cause bearing damage or corrosion. It’s less common but can be a factor in high-tech systems.
What Are the Different Types of Wheel Bearings Used in Motorcycles?
| Bearing Type | Typical Use | Load Handling | Maintenance | Advantages | Disadvantages |
|---|---|---|---|---|---|
| Sealed Deep-Groove Ball Bearings | Modern street, off-road, adventure, cruiser motorcycles | High radial, moderate axial; low friction | Zero maintenance; sealed and pre-lubricated | Affordable, durable, standardized sizes, contamination-tolerant | Axial load limitations; can wear with contamination |
| Hybrid Ceramic Ball Bearings | Superbikes, MotoGP, drag racing (performance upgrades) | High radial, moderate axial; extremely low friction | Zero maintenance; sealed but high cost | Lightweight, ultra-low friction, improved acceleration | Very expensive; minimal benefit for street use |
| Tapered Roller Bearings | Older/vintage heavy cruisers and tourers (historical wheel use) | Very high radial & axial (thrust); excellent shock resistance | Requires greasing, preload adjustment, periodic service | Handles heavy loads and impacts; very strong | Higher friction; outdated for modern wheels |
| Double-Row Angular Contact Bearings | High-performance single-sided swingarm rear hubs | High radial & bidirectional axial; high rigidity | Low maintenance; requires correct preload during installation | Handles extreme side loads; ideal for single-sided hubs | Expensive; niche usage |

Understanding the types of wheel bearings used in motorcycles helps you choose correct replacements and better identify possible failure conditions.
- Sealed Deep-Groove Ball Bearings (Most Common): Pre-lubricated cartridge bearings with hardened steel balls running in deep raceways, used in standardized metric series (e.g. 6204-2RS, 6205-2RS) in the front and rear hubs of most modern street, off-road, adventure, and cruiser motorcycles. They’re designed to carry predominantly radial loads (weight of bike and rider) with moderate axial loads (cornering forces) while offering low rolling resistance and virtually zero maintenance. For everyday street and off-road use, steel ball bearings are usually preferred because they are cheaper and more tolerant of real-world abuse and contamination.
- Variation-Hybrid Ceramic Ball Bearings (Performance Upgrades for Racing): Usually the same deep-groove ball design as stock, but instead of steel balls they use ceramic balls (often silicon nitride) in steel races. Lighter (up to 60-75%) and smoother, they reduce friction (roughly one-tenth the friction of an equivalent steel bearing) and rotating mass, so race bikes accelerate harder and waste less power. Ceramic hybrid wheel bearings are a favored upgrade option seen in Superbikes, MotoGP, and drag bikes. But the performance gain for everyday street riding is minor (and the cost is high).
- Tapered Roller Bearings (Older and Heavy Motorcycles): Use conical rollers and angled races instead of balls, giving them very high radial and axial (thrust) load capacity along with excellent shock resistance. Historically used as wheel bearings on vintage and heavyweight cruisers and tourers (e.g. older Harley-Davidsons and some older BMW models) because they distribute forces over a larger contact area. However, they need correct preload (tightening) and regular cleaning and greasing, and create more friction than sealed ball bearings, so they’re rare on modern wheels. Today, tapered rollers are more commonly found in the steering head (neck bearings) than in the wheel hubs.
- Double-Row Angular Contact Bearings (High-Performance Single-Sided Hubs): Compact hub units with two angular-contact ball rows in one cartridge, designed to carry high radial loads and substantial bidirectional axial (side) loads with high rigidity and zero end-play when preloaded. Commonly used in single-sided swingarm rear hubs on performance bikes (e.g. Ducati 1098/1198), where the wheel is supported from one side and cornering forces are concentrated through a single, stout bearing. Outside of single-sided rear wheels, double-row or angular contact bearings are not common in standard motorcycle wheels.
For the average motorcycle wheel hub, deep groove ball bearings are sufficient. They manage the combination of radial loads from the bike and rider weight, along with the moderate axial loads encountered during normal riding.
How Do I Check My Motorcycle Wheel Bearings?
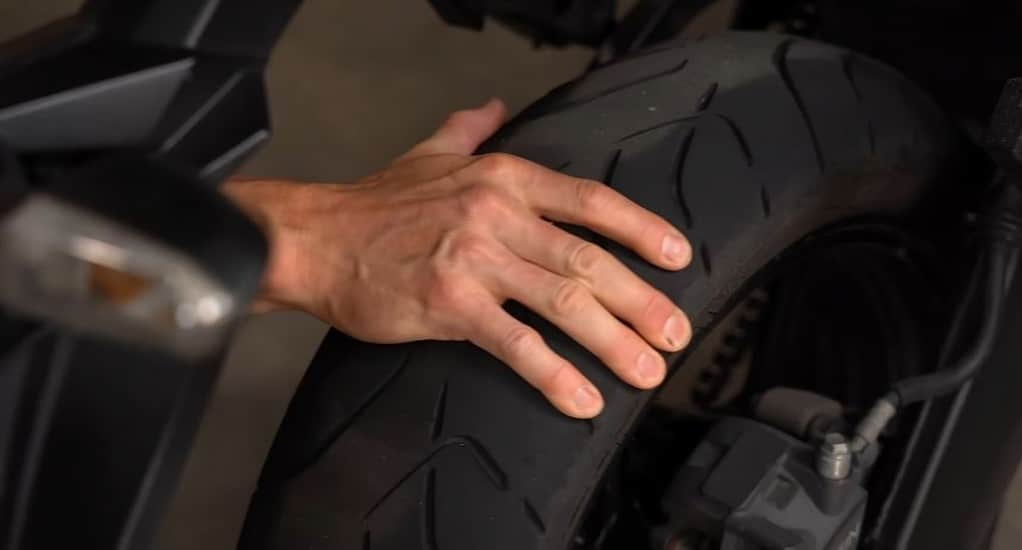
Checking your motorcycle wheel bearings isn’t difficult, but it does require care, the right support stands, and a systematic approach. This is the exact process I use on my own bikes before deciding whether bearings are safe to keep or ready to replace.
Tools You’ll Need
You don’t need a full workshop to do this, but a few basic tools make the job safer and more accurate:
- Socket Set/Axle Tools: For loosening axle nuts, pinch bolts, and removing the wheel if needed.
- Motorcycle Stand, Jack, or Center Stand: To lift and stabilize the bike securely with the wheel off the ground.
- Torque Wrench: For re-tightening axle and pinch bolts to the correct specification after inspection or removal.
- Grease: For installing new bearings or lightly coating axle and spacers (sealed bearings are pre-lubricated internally).
- Bearing Puller or Suitable Drifts: Not strictly needed for inspection, but essential if you proceed to bearing removal and replacement.
- Good Lighting: A flashlight or inspection light to clearly see seals, rust, and contamination around the hub.
Safety Note: Always make sure the bike is rock-solid on the stand before you touch the wheels. If it can rock or move, stabilize it first.
Step-by-Step Guide to Checking Your Motorcycle Wheel Bearings
Step 1. Lift and Secure the Motorcycle
Use a paddock stand, center stand, or jack (with proper adapters or blocks) to lift the wheel you’re checking off the ground:
- For the front wheel, support the bike under the engine or triple clamps (or use a front stand that lifts under the steering stem).
- For the rear wheel, use a rear paddock stand, center stand, or a suitable jack under the swingarm.
The wheel must spin freely without touching the ground and the bike must not feel unstable.
Step 2. Check for Play (Wobble Test)
With the wheel off the ground:
- Grab the wheel at the 12 o’clock and 6 o’clock positions.
- Gently push and pull, trying to rock the wheel side to side.
- Repeat at 3 o’clock and 9 o’clock if you want to be thorough.
You are feeling for:
- Any play, knock, or looseness at the rim.
- A clicking or clunk as you rock the wheel.
On a healthy wheel bearing, there should be no noticeable play. The wheel should feel solid on the axle. Any detectable movement at the rim, once you’ve confirmed the axle is properly torqued and spacers are in place, is a strong indicator that the bearings are worn and should be replaced.
Step 3. Spin the Wheel and Listen for Noise
Next, spin the wheel by hand:
- Rotate the wheel at a moderate speed and let it coast.
- Listen closely at the hub area, not just the tire.
- You can lightly rest your fingers on the swingarm, fork leg, or axle to feel for vibration.
Unhealthy bearings may produce:
- Grinding or growling sounds (metal-on-metal feel or sound).
- Rumbling, buzzing, or droning that changes with wheel speed.
- A notchy or “dry” feel as the wheel spins.
Healthy bearings will:
- Spin smoothly and freely.
- Be quiet, aside from normal chain, brake pad, or tire noise.
- Feel silky, with no rough spots or pulsing as the wheel rotates.
If you hear or feel any harshness, it’s a strong sign the bearing surfaces or grease have degraded and replacement is due.
Step 4. Visual Inspection Around the Hub and Seals
Now check the hub area carefully, on both sides:
- Look closely at the bearing seals (the rubber or metal rings at the hub face).
- Check for rust staining, moisture, or grease leakage around the seals.
- Look for dirt, mud, or grit packed around the seal lips.
- If the wheel is already off, inspect the bearing bores and spacers for metal dust or shavings.
Red flags include:
- Rust or corrosion around the seal or on the axle.
- Washed-out, milky, or contaminated grease (a sign water has been inside).
- Torn or deformed seals, which allow dirt and water directly into the bearing.
- Visible metal particles is evidence the bearing is breaking up internally.
Any of these signs mean the bearing has been compromised, even if it still feels “okay” on the stand. Replace it rather than waiting for it to fail on the road.
Step 5. Optional: Feel the Bearing Directly (With the Wheel Removed)
If you’re preparing to replace bearings or already have the wheel off (for a tire change, for example), you can perform a more direct check:
- Support the wheel on a bench so it can’t roll.
- Put a clean finger inside the inner race of the bearing.
- Rotate the bearing slowly with your finger.
You’re feeling for:
- Roughness, pitting, or binding as it turns.
- Notchy spots rather than smooth, even rotation.
- Any play between the inner and outer race.
A good bearing will feel uniform and smooth with no “gritty” sensation. If you feel any roughness at all, the bearing is already on its way out, and since the wheel is off, it’s the perfect time to replace it.
When Do I Replace My Motorcycle Wheel Bearings?
From my own experience, these are the key signs and situations that tell you it’s time to replace your motorcycle wheel bearings.
- When Basic Inspection Fails: Replace your motorcycle wheel bearings if, with the wheel lifted off the ground, you feel any lateral play or wobble at the rim, notice rough or notchy rotation, or hear grinding, rumbling, or clicking noises from the hub. when you spin the wheel by hand.
- When Riding Symptoms Show Up: Replace the bearings if you notice irregular tire wear unrelated to suspension or pressure, persistent vibrations through the handlebars or pegs, unstable or wobbly handling, the bike wandering or pulling to one side as if a wheel were loose, or humming/grinding noises from the wheels that change with road speed rather than engine RPM. These are all classic signs of worn wheel bearings.
- Based on Service Life and Intervals: Quality wheel bearings can last tens of thousands of miles, and some well-maintained sets can reach around 100,000 miles before failure, which is why most manufacturers don’t specify a fixed replacement interval. Instead, they recommend periodic checks, with many street bike manuals advising inspection roughly every 7,500 miles, and more often if ridden hard or in bad conditions.
- When Conditions Accelerate Wear: Replace or at least be very suspicious of bearings sooner if you regularly ride in water, mud, rough off-road terrain, or deep potholes, because water, grit, and repeated impacts drastically shorten bearing life. Treat any sign of contamination, rust, or damaged seals as a strong replacement trigger.
- During Major Wheel or Hub Work: Replace bearings proactively any time you have the wheel fully stripped (e.g., wheel rebuild, hub repaint/powder coat, spoke replacement, or frequent tire changes on a race bike) since bearing cost is low compared to labor and downtime.
- Before and After Extreme Use: Consider replacing bearings before especially demanding use (race prep, track days, or long high-speed tours) if their age or history is unknown. Also replace them after hub contamination events, such as deep water crossings or mud immersion, where moisture and grit may have entered and will quickly destroy the bearing if left in service.
- After Contamination or Seal Damage: Replace bearings if they’ve been exposed to water, mud, or pressure-washing at the hub, or if you see torn/damaged seals, rust staining, milky/washed-out grease, or any sign of grit inside the hub.
- General Rule of Thumb: If a wheel bearing is anything other than perfectly smooth, quiet, and free of play, treat it as worn and replace it.
Acting on these signs and situations keeps me safe and maintains smooth riding. Ignoring faulty bearings can lead to unstable handling, abnormal vibrations, and in severe cases, wheel failure.
How Do I Remove and Replace Motorcycle Wheel Bearings?
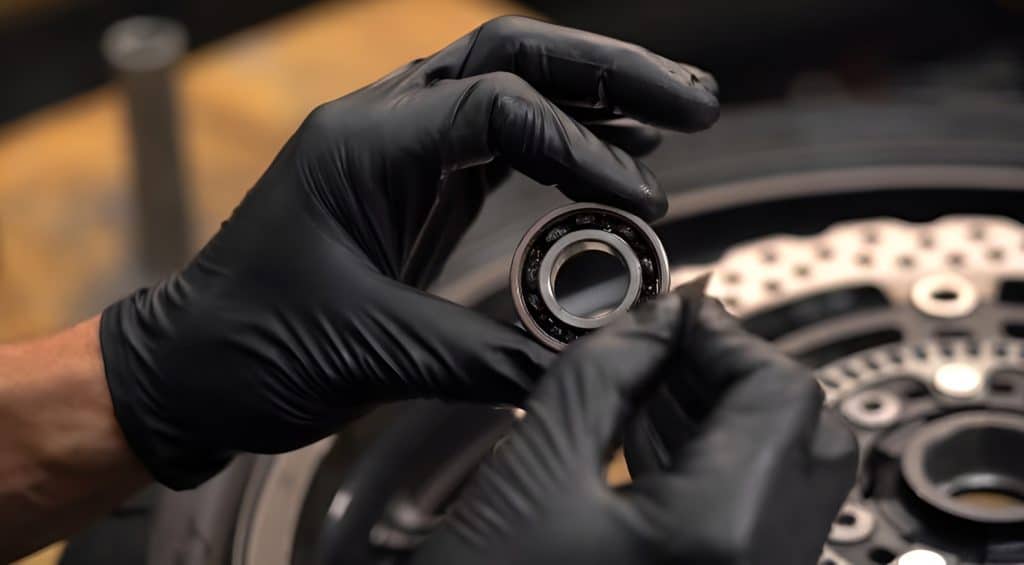
Replacing wheel bearings may seem daunting, but it’s a manageable task with the right tools and a little know-how.
Essential Tools
- Motorcycle stand or lift
- Socket wrench set for the axle nut
- Safety glasses
- Wheel-bearing remover or punch/drift set
- Mallet or hammer with a wooden or nylon block
Helpful Extras
- Circlip pliers
- Wooden blocks to support the wheel hub
- Propane torch or heat gun for stubborn bearings
- High-temperature, waterproof bearing grease
- Brake cleaner and rags for hub cleaning
- Workshop/service manual for your specific bike
Step-by-Step Guide on How To Remove and Replace Motorcycle Wheel Bearings
Here’s my step-by-step guide to removing and replacing motorcycle wheel bearings:
Step 1: Remove the Wheel
- Lift and Secure the Motorcycle: Use a front or rear stand (or jack) to raise the bike so that the wheel you’re working on hangs freely. Ensure the bike is stable before proceeding.
- Remove Wheel-Mounting Hardware: Loosen and remove the axle nut with a socket wrench. Then remove the brake caliper(s) by unbolting them from the fork or swingarm, and set them aside without stressing the brake lines. If it’s the rear wheel, also loosen any chain or belt adjusters and disengage the chain or belt from the sprocket. Keep track of any spacers or washers on the axle; note their order and orientation for reassembly.
- Slide Out the Axle and Lift off the Wheel: Carefully slide the axle out of the hub (you may need to tap it gently from one side once the nut is off). Support the wheel as you remove it so that it doesn’t fall. Place the wheel on wooden blocks or another clean flat surface, making sure the brake disc or rotor is not touching the ground. Supporting the wheel on blocks of wood protects the rim and disc when you begin removing bearings.
Step 2: Remove the Old Bearings
- Remove Seals and Clips: Use a flat screwdriver to pry out any dust seals covering the bearings. Behind sealed bearings, there may be a circlip retaining ring; remove it with snap-ring pliers if present (you must remove the seals and rings before the bearings can come out). Wipe the hub interior clean and inspect for damage or excessive corrosion
- Use a Bearing Puller or Drift: If you have a bearing puller set, position it so that it grips the bearing’s inner race or outer edge and press the bearing out of the hub. If a puller isn’t available or doesn’t grip, a long drift (steel punch) and hammer can be used. Place the wheel so the side of the hub is supported (again on wood blocks) and tap a drift against the bearing’s inner race (or the bearing spacer, if accessible).
- Drive it Out Evenly: Strike alternating sides of the bearing in a circle, “walking” it out a bit at a time. Use steady blows; you only need light to moderate force if aligned properly. Caution: Only apply force to the outer race or spacer. Driving on the inner race can collapse the bearing and damage it.
- Apply Heat if Needed: If bearings are stubborn, gently heat the hub around the bearing with a torch (about 175°F/80°C or so) for a minute or two. This expands the hub metal slightly and makes the bearing easier to remove (always heat the hub, not the bearing itself). After heating, try tapping the bearing out again; it should come free with fewer blows. Continue until all bearings and any spacer washers are out. Inspect the hub bore and clean away any rust or debris. Check that the spacer sits properly in the hub before proceeding.
Always replace all bearings (and seals) in a wheel at the same time, even if only one seems bad. Any removed seals should be replaced with new ones.
Step 3: Install the New Bearings
- Select and Prepare Bearings: Confirm the replacement bearings and seals are the correct size and type for your wheel (check the manual or bring an old bearing to the parts dealer). If the bearings are “open” (no rubber seal), pack a thin layer of high-quality bearing grease on both sides. Even sealed bearings often benefit from grease around the lip of the seal. For easier fitment, I always pre-chill the new bearings in a freezer beforehand; they shrink slightly. Also consider reheating the hub briefly so that it is warm, which will expand the metal again.
- Seat the First Bearing: Place the wheel on a sturdy support (blocks of wood as before). Put one new bearing in its bore on one side of the hub (usually the side with the circlip if applicable). Make sure it is straight and square. Using a socket or bearing driver whose face only contacts the bearing’s outer race (or a piece of the old bearing cut down), tap the bearing gently into the hub. Begin by lightly tapping around the edge in several places, then use a mallet (or block of wood over the bearing) to firmly drive it home until it sits flush with the hub face. Listen for a change in sound; Once the bearing hits bottom, the tone will change. Only strike the outer race or use a tool on the outer edge; do not hit the bearing on the inner race.
- Install Spacer and Second Bearing: If there is a wheel spacer (usually only on the rear wheel), insert it now so that it sits against the first bearing. Then install the second bearing on the opposite side of the hub in the same way. Align it squarely against the spacer and tap it in using the same method: evenly on the outer race with a socket or driver until it is seated. Be careful not to over-drive the bearing past the spacer lip; as soon as the bearing feels solid against the spacer, stop hammering. If the spacer isn’t perfectly aligned, you can nudge it with a punch or your finger before final seating.
- Fit New Seals: If your wheel has dust or oil seals, pack the back side of each seal (the side facing the bearing) with a little grease and then press the seal into the hub by hand. They should go in flush; gently tap only on the outer edge with a flat piece of wood if needed. Be sure the open side of the seal faces inward toward the bearing. Smear a bit of grease on the inner lip of each seal after installation.
At this point the bearings should rotate smoothly with no binding. Give the wheel a spin to confirm they turn freely and quietly.
Step 4: Reassemble the Wheel
- Reinstall the Wheel: Slide the wheel back into the forks or swingarm. Make sure any spacers or cush-drive components are properly positioned between the bearings as before.
- Insert Axle and Torque: Carefully slide the axle through the wheel hub, forks and any remaining spacers. Tighten the axle nut to the correct torque specified by your motorcycle’s manual. Use a torque wrench if available. Ensuring the wheel is centered, secure.
- Reattach Brakes and Final Parts: Re-bolt the brake caliper(s) onto the forks or swingarm. If you loosened a chain or belt, re-engage it and adjust tension. Double-check that all fasteners are tight and any wheel spacers are on the correct sides. Confirm the brake rotor is free of grease or oil at this point. Finally, pump the brake lever a few times to set the pads.
- Test the Installation: With the bike still supported, spin the wheel by hand. It should turn easily without grinding or wobble. Check that there is no lateral play (wiggle) in the wheel. Rock the wheel back and forth by gripping the tire; any “knock” indicates an issue. After ensuring everything is secure and clean, lower the bike.
- Road-Test: Take a short test ride at low speed. The wheel should roll smoothly without noise or drag. Watch for any vibration or unusual behavior. After the test, recheck axle torque and brake operation
How Do I Maintain My Motorcycle Wheel Bearings?
Regular maintenance will help your new motorcycle wheel bearings last as long as possible. Here are a few tips I’ve learned over the years:
- Inspect wheels and bearings during routine maintenance such as chain checks or tire pressure checks.
- Lift the bike and spin each wheel by hand to feel for smoothness, roughness, or binding.
- Check for lateral play by holding the wheel and rocking it side to side.
- Keep hub areas clean and dry because moisture and dirt shorten bearing life.
- Avoid using high-pressure washers on hubs because they can wash grease out of the bearings.
- After riding in rain or mud, or after washing the bike, clean the wheel hubs and apply a thin layer of grease around any exposed bearing seals.
- For open-design bearings or the back of open seals, re-grease periodically with a high-temperature waterproof grease that meets NLGI “GC-LB” standards.
- Sealed bearings do not require internal greasing but the rubber lip should stay clean and lightly greased to maintain a good seal.
- Do not ignore warning signs. Any roughness, clicking, or wobble means the bearings should be replaced.
- Inspect wheel bearings roughly every 7,500 miles and more often if you ride off-road or in wet conditions.
With careful installation and maintenance, your new wheel bearings should provide many miles of trouble-free riding.
Michael’s Summary and Conclusion
As an avid rider who personally maintains a collection of over 25 motorcycles across racing, touring, track, and off-road categories for more 50 years, I can attest that learning how to check, remove, and replace your motorcycle’s wheel bearings is an essential skill every rider should have. Not only does it save you time and money, but it also keeps your bike in peak condition for optimal performance and safety. I’ve made it a habit to regularly inspect and service the wheel bearings on all my bikes, especially after 5,000 miles, and this proactive approach has served me well over the years.
By regularly inspecting and maintaining your wheel bearings, you can prevent common issues like rough handling, persistent vibrations, and unusual noise. For instance, catching a worn or damaged bearing early on will spare you from the wobbling wheels or grinding sounds that signal bigger problems ahead. Addressing these issues promptly ensures each ride remains smooth, safe, and enjoyable for years to come.
It’s also important to understand the different forces that act on your wheel bearings, because many bearing failures stem from applying loads that the bearings weren’t designed to handle. A wheel bearing primarily faces two types of forces: radial and axial. A radial load is a force applied perpendicular to the axle (for example, the weight of the motorcycle pressing down on the wheel hub), whereas an axial (thrust) load is applied parallel to the axle, such as the side forces generated during cornering, braking, or any lateral wheel movement.
In most motorcycle wheel-bearing applications, the radial load is the dominant force involved. The standard sealed ball bearings found in most wheels are designed to handle these heavy radial loads and can also tolerate a moderate amount of thrust (axial load) magazine. However, even smaller axial stresses can become highly damaging if the bearing’s design, seating, or lubrication isn’t suited to handle them, potentially cutting the bearing’s life expectancy significantly short. In fact, using a purely radial ball bearing in a situation with high side loads can slash its lifespan by nearly half.
That’s why when selecting or installing new wheel bearings, you must ensure they are rated for both types of loads your bike will encounter: the weight load (radial) and the side stresses from braking, cornering, and other maneuvers (axial). This attention to detail is something I practice on all my bikes, and it’s a big reason why they continue to perform reliably every time I ride. In my experience, taking proper care of your wheel bearings gives you the peace of mind and confidence that your motorcycle will stay smooth, safe, and road-ready for many miles to come.
FAQs — I Have the Answers!
Q: What Are the Signs of a Bad Motorcycle Wheel Bearing?
The signs of a bad motorcycle wheel bearing include humming, squealing, or growling noises that increase with speed; harsh vibrations through the handlebars; excessive wheel play or wobble when moved side-to-side; uneven tire wear; and the bike pulling to one side while riding.
Q: How to know If a Motorcycle Wheel Bearing Is Bad?
You know a motorcycle wheel bearing is bad if the wheel has any side-to-side play when lifted, feels rough or notchy when spun by hand, or produces grinding, rumbling, or humming noises that change with road speed. Other signs include vibration through the bars or pegs, vague or wandering steering, and the hub or axle area running unusually hot after a ride.
Q: How Often Should You Replace Motorcycle Wheel Bearings?
Most motorcycle wheel bearings don’t have a fixed replacement interval; instead, they’re replaced when wear is detected. As a rule of thumb, inspect them at every tire change or roughly every 7,500-10,000 miles, and replace them immediately if there is play, roughness, noise, visible rust, or damaged seals. In harsh use (off-road, heavy rain, water crossings, salt, or track riding), expect to replace them sooner, even if mileage is relatively low.
Q: How Do Motorcycle Wheel Bearings Work?
Motorcycle wheel bearings use hardened steel (or ceramic) balls that roll between an inner and outer race, allowing the wheel to rotate smoothly around the axle with minimal friction. They support high radial loads (bike and rider weight) and moderate axial loads (forces from cornering and braking), helping keep the wheel properly aligned in the forks or swingarm while reducing drag and heat buildup at high speeds.
Q: Can You Ride a Motorcycle with a Bad Wheel Bearing?
Yes, you can physically ride a motorcycle with a bad wheel bearing, but it is unsafe and strongly discouraged. A failing bearing can quickly progress to severe play, wheel wobble, loss of alignment, and in extreme cases wheel lock-up or hub damage, which can cause a crash. At the first sign of bearing failure, the bike should be parked and the bearing replaced rather than ridden “until it gets worse.”
Q: What Is One of the First Signs of Motorcycle Wheel Bearing Failure?
One of the first signs of wheel bearing failure is a speed-dependent humming or rumbling noise from the wheel area that wasn’t there before. Early failure can also show up as a faint roughness when spinning the wheel by hand or a slight, newly developed vibration or wander in straight-line riding.
Q: How Much Does it Cost to Replace Wheel Bearings on a Motorcycle?
On most motorcycles, replacing wheel bearings typically costs around $100-$300 at a shop, depending on the bike and local labor rates. Parts (bearings and seals) usually run $20-$80 per wheel, while labor is often 1-2 hours. If you do the work yourself, your main cost is the bearings, seals, and any tools you don’t already own.
Q: How to Tell if a Motorcycle Wheel Bearing Is Bad?
A motorcycle wheel bearing is bad if there is any free play at the rim when you rock the wheel, any rough or gritty feeling when the wheel or bearing is rotated, or any grinding/rumbling noise that follows wheel speed. Visual signs like rust around the seals, leaking or contaminated grease, or damaged seals are also clear indicators the bearing should be replaced.
Q: How to Tell if Bike Wheel Bearings Need Replacing?
Bike wheel bearings need replacing if they fail three basic checks:
- Play: any looseness when you rock the rim side-to-side.
- Smoothness: any notchiness, binding, or “sand in the bearing” feel when rotating.
- Noise: any grinding, ticking, or rumble that changes with wheel speed.
If you see rust, pitted races, or metal particles when the wheel is off, replacement is mandatory.
Q: How to Check if Your Motorcycle Wheel Bearings Need to Be Replaced?
To check if your motorcycle wheel bearings need replacement, lift the wheel off the ground, then:
- Rock the wheel at the rim (12-6 and 3-9 o’clock) to feel for play or knocking.
- Spin the wheel and listen for grinding, rumbling, or scraping noises.
- Inspect the hub and seals for rust, leaking or milky grease, dirt packed around the seal, or visible damage.
If any of these checks fail, the wheel bearings should be replaced.
Q: How Do You Test/Inspect a Motorcycle Wheel Bearing?
To test a motorcycle wheel bearing, unload the wheel, then check for:
- Radial/axial play by rocking the wheel at the rim.
- Rotational smoothness by turning the wheel or bearing slowly by hand.
- Noise and vibration by spinning and listening/feeling at the hub.
For a more precise test with the wheel off, rotate the inner race with a fingertip; any roughness, clicking, or tight spots means the bearing is worn.
Q: How to Check Faulty Motorcycle Wheel Bearings?
Suspected faulty motorcycle wheel bearings should be checked for play, roughness, noise, and visual damage. Any detectable wobble, grinding feeling, temperature rise at the hub, or evidence of rust, pitting, cracked races, or metal shavings indicates the bearing is faulty and must be replaced rather than reused.
Q: How to Check Front Motorcycle Wheel Bearing Without Removing Tire?
To check a front motorcycle wheel bearing without removing the tire, put the front wheel off the ground using a stand or jack, then:
- Grip the tire at opposite points on the rim and rock it side-to-side and up-and-down to feel for play.
- Spin the wheel and listen for grinding or rumbling from the hub, not the brake pads.
- Lightly touch the fork leg or axle while spinning to feel for vibration.
If there is any play, roughness, or noise, the front wheel bearings should be inspected more closely and likely replaced.
Information for this article was partially sourced and researched from the following authoritative government agencies, educational institutions, and nonprofit organizations:
M/A


