One of the major challenges motorcycle riders face when riding their bikes is unexpected tire punctures. This can happen anytime and anywhere, and your ability to know how to remedy the problem will save you a ton.
In this detailed tutorial, I’m going to show you how to repair a tubeless bike tire. It’s a simple DIY skill every rider should have, especially if your bike is using tubeless tires. To begin with, I will show you the tools needed for the repair of tubeless bike tires before showing you how to execute the operation.
")
Tools Needed to Repair a Tubeless Motorcycle Tire
First things first, before I show you how to repair a tubeless bike tire, you need to have the right set of tools for the operation. Also, you need to always carry your tools with you because you never know when you will need them. For this reason, I recommend having a compact tire repair kit that can easily fit in your backpack or motorcycle storage.
Having said that, below is what you should have in a tubeless bike tire repair kit:
- Reamer
- Plugging tool or plugger
- Tire plug strips
- A knife or any cutter
- A plier or any other tool for nail removal
- Rubber glue or rubber cement (optional)
- Motorcycle tire inflator with gauge
These are basically all you need to have in your tool kit to remedy any unexpected tire puncture while on the road.
")
With these tools in place, let’s go through the steps on how to repair a tubeless bike tire.
The chart below are my top recommendations for motorcycle tire repair kits:
| Product | Category | Check & Shop Now |
|---|---|---|
| Stop & Go Tubeless Tire Shop Repair Kit | Best kit for DIY tubeless tire puncture | RevZilla | Amazon |
| BikeMaster Tire And Tube Flat Repair Kit | Best kit for tubed and tubeless tires | RevZilla | Cycle Gear |
| Moose Racing Tire Repair Kit | Best mid-range tire repair kit | RevZilla | Cycle Gear |
| Milwaukee Twins Tire Repair Kit | Most versatile kit | RevZilla | Cycle Gear |
| Stop & Go T-Handle Tire Repair Kit | Best budget-friendly repair kit | RevZilla | Amazon |
Step-by-step Instructions on How to Repair a Tubeless Bike Tire
The first thing to know about how to repair a tubeless bike tire is to know that you have a flat tire when riding your bike. Some of the signs of flat tires include sudden changes in handling and stability, hissing sounds, loss of pressure, or unusual vibrations. Once you notice any of these, it is likely that you have a flat and you should pull over.
Below is what you should do to fix it.
1. Identify the punctured spot
After confirming that your tubeless motorcycle tire is punctured or flat, you need to identify the puncture that needs repair. In some cases, you will see the nail or any other sharp object responsible for it still stuck to the tire. If that’s the case, then you don’t have to do much to identify the spot. Use your plier or any other available tool to pull out the nail or any other object from the tire.
However, if the object responsible for the deflation isn’t stuck to the tire, then you need to carefully locate the spot that needs repair. Spin the wheel and check through the tire to find the spot. If you are privileged to have some water with you, you can speed up the identification process by pouring water on the tire. Once you notice any bubbles, then that’s the spot!
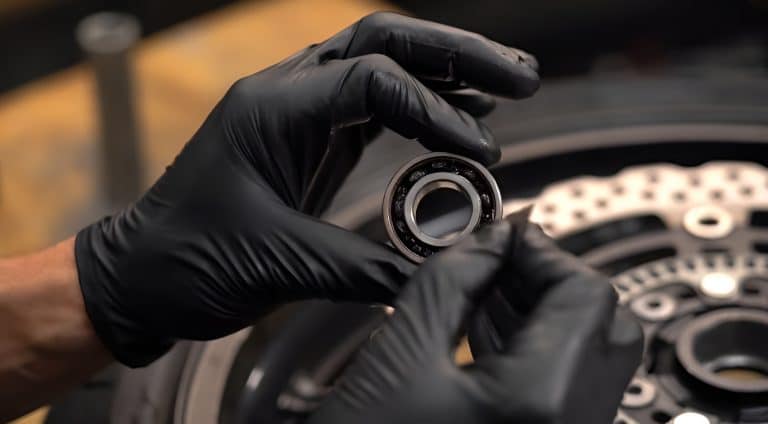
2. Cleaning the Spot and Getting it Ready to be Plugged
Once you locate the hole on your tubeless tire, use the reamer to clean the hole and get it to expand a bit to get it ready for plugging. To do this, simply insert the reamer into the hole, pull it in and out, and also spin it to get a better result. You will need to apply force to get the reamer through the hole.
This is necessary because we want the plugger to pass through the hole easily. The cleaning and preparation process should take about a minute or two.
3. Plugging the Punctured Tire
Now that the punctured spot has been cleaned and is ready to be repaired, you need a plugger, plug strips, and maybe rubber glue or cement (using the glue or cement is left to you).
The plugger is just like a big needle. As a needle has an eye where a thread can pass through, so too does the plugger tool have an eye where you can easily pass the plug strip through. The plug strips usually come in packs of 3s, 4s, or 5s, but you only need one to execute the task.
Next, peel off one strip from the pack and pass it through the eye of the plugging tool until it’s about halfway through (until it has equal length on both sides of the tool). You can decide to rub some rubber glue on the plug strip for a firmer and more secure result. But don’t worry if you don’t have rubber glue, as you can still achieve almost the same result without the glue.
Note: At this point, the reamer should remain in the hole to prevent more air from sipping through the tire.
Now, remove the reamer and immediately plug the plug strip into the tubeless tire by using the plugging tool. Allow about three-quarters of the strip to go inside the tire before pulling out the plug tool. Thereafter, get a knife or a cutter to cut about one-quarter of the plug strip remaining on the tire.
I recommend you leave it for about 10 to 15 minutes to allow it to set in and stick firmly.
")
4. Check for Other Possible Holes Before Inflating the Tire
While it is likely that just a hole in your tire is responsible for the leak, you want to be doubly sure there isn’t any other opening on your tire. Personally, I have had this issue in the past, and it left me frustrated to find out during a ride that there was another hole on the tire after repairing the one that was quite visible to me.
Therefore, to save yourself from stress, always check properly and fix any holes on the tire once and for all before inflating the tire.
5. Inflate the Tire and Gauge it to the Recommended Level
The final step in how to repair a tubeless bike tire is to inflate it and gauge it to the level recommended by the tire’s manufacturer. That is it on how to repair a tubeless bike tire!
You may like:
Explore 8 Main Motorcycle Tire Types For Confident Selection
Is There Any Alternative to Repairing Tubeless Motorcycle Tires with Plugs?
Yes, there is an alternative to using plugs to repair a tubeless tire, but the process can be time-consuming and may not be suitable for emergencies. It involves using a tube patch and fixing the tire from inside. For you to do that, you need to take the tire off, dry it out, and patch it from the inside with a rubber tube patch. Allow it to set for a while, and then fix it all back together.
While this process can be time-consuming when compared to using a plug, it seems to offer a long-lasting solution to punctures. You should only consider going this route if you notice leaks a few minutes or hours after using the plug method. In most cases, using the plugger and plug strip should be enough to fix a tubeless tire.
Frequently Asked Questions About How to Repair a Tubeless Bike Tire
Q1: Are tubeless tires easy to repair?
Yes, tubeless tires are easy to repair, and the process is simple to learn. It usually takes approximately 15 minutes to repair a tubeless tire.
Q2: How long do tubeless tires last after puncture repair?
A tubeless tire can last for several months or years after puncture repair, depending on the size of the hole and how often repairs have taken place on the tire. Your mechanic can assist you in knowing when your tire is due for replacement.
Q3: Is tubeless tire repair from the inside possible?
Yes, it is possible to repair a motorcycle tubeless tire from the inside by using a tube patch. You need to take the tire off, dry it out, and patch it from inside with a rubber tube patch. Allow it to set for a while, and then fix it all back together. This process takes more time.
Q4: What happens if you get a puncture with tubeless tires?
You can either fix it yourself if you have the skills and toolset needed for the repair or locate the nearest repair shop close to you. It is always advisable to have a repair kit and know how to repair a tubeless bike tire, as it can save you a lot of frustration.
Q5: Who needs the tubeless tire repair kit the most?
As long as you have a motorcycle with tubeless tires, you need a tire repair kit. Nevertheless, for adventure riders who like to ride through mountains, trails, or rough terrain, having this toolset and knowing how to fix your tires is non-negotiable.
Michael’s Summary and Conclusion
Knowing how to repair a tubeless bike tire can save you from disappointment and frustration. You never know when this skill will come in handy, hence the need to share this vital information with you. With this information, if you are in the middle of nowhere and you have a flat tire, you can easily fix it as long as you always carry your tool kit with you.
") I've diligently categorized my motorcycle gear recommendations into all available categories, with the aim of providing you with a comprehensive analysis that showcases the absolute best options for all your needs. These items are the culmination of in-depth research, extensive testing, and personal use throughout my vast experience of 50+ years in the world of motorcycling. Besides being a passionate rider, I've held leadership positions and offered consultancy services to reputable companies in over 25 countries. To See Top Picks and the Best Prices & Places to Buy: Click Here! |
Information for this article was partially sourced and researched from the following authoritative government, educational, corporate, and nonprofit organizations:
- Tire Basics
- Remove, inspect, repair, and refit light vehicle tires and tubes
- Federal Motor Vehicle Safety Standards; Tires
Ni/JO